Saturday, December 19, 2009

A few tid bits on the KLR

The one thing I knew was happening with the KLR was the exhaust seal was leaking very slightly. I reused it after I took off the the head pipe for something I can’t even remember why. It was obviously leaking and annoying when down shifting, the bike would make a lot of extra pops.

IMG_2075

That black corner on the bottom right is the leak spot. After a little ride around the block and no more flatulence from the back-end.

The next thing that stuck in my head was the kickstand switch. When I rode trails and would stand up on the pegs and the heal of my boot constantly pressed on the switch cover. If I cracked the switch while riding the bike would die out which would be a bummer.

IMG_2068

This is the switch connector that needs to be jumered to eliminate the option.

IMG_2069

Pretty simple = one bolt!!

IMG_2070

Taking the switch off does leave you with a big ugly blank plate to look at but worry free.

IMG_2071

Wires butt connected and weatherproof. I electrical taped it up and it’s all hidden behind the starter solenoid cover plate.

The last thing to do was the heated grip switch. The switch is not waterproof or even water-resistant. I’m surprised it lasted a year in the rain and multiple bike washes. At the time I couldn’t find a waterproof and small switch. There really isn't many options that worked well for my spot on my bike either.IMG_2063

Last week I was looking into heated seats on the web for the wife's van and stumbled onto a rubber cover for a 13/16 rocker switch. For only a few bucks it was at my door in four days.

IMG_2064

kind of looks like a big contact lens.

IMG_2065

The switch needs to be popped out to get lipped over the edge.

I know this isn’t perfect but it should help keep the elements out of it.

IMG_2067

Fit was very close to perfect. With the camera flash it makes the cover look translucent but it’s pretty clear with the naked eye.

Next week will be tinkering with the RD400 again, since I have been slacking off on that project since late may.

Sunday, December 13, 2009

KLR White Brother’s Muffler Repack

IMG_2029

The Klr muffler has been growing louder in this last season of riding. It’s now three years old and about 9500 miles on it. Not a ton of miles but you have to figure one large cylinder pulsing and beating the muffler packing can’t last forever.

IMG_2030

This is one thing I’m getting used to doing with bolts so they don’t vibrate out. Safety wire is your friend on a bike that has a large amount of vibration. The KLR has a know reputation for loosing nuts and bolts. So much so that many riders have had their mufflers fall off on the street. Eventually Kawasaki made it a recall to come in and have the bolts re-torqued.

You can buy a spool of safety wire and the pliers for under forty dollars. The hardest part of the job is removing the bolts to get a small hold drilled through the bolt head.

IMG_2032

off of the bike and ready for tear down.

IMG_2034

This is the spark arrester with the broken down packing material blown into it.

IMG_2050

This is the spark arrester trim ring with more packing stuck in it.

Last spring I had the trim ring powder coated with a few other pieces from another bike and the ring was perfectly clean of any packing. I’m pretty surprised how fast it degraded.

IMG_2033

Drilling out the rivets was event free with a nice new drill bit.

IMG_2038

muffler torn down and ready for a fresh roll of insulation.

IMG_2054

This is the old pack and it was destroyed.

IMG_2053

The new insulation was a Two Brothers repack kit that worked perfectly. Above is all I had to cut off the roll they sent me and the rest squeezed in with some work.

IMG_2041

I used painters tape to hold the insulation down.

IMG_2039

First thing was to tuck the insulation under the flange lip so the can edge will slip over nicely later.

IMG_2040

The overhang is no big deal since stuffing it in the can will force it back perfectly.

IMG_2042

Can is almost on and getting to be more a challenge as the core went in. I also removed the hold down tape before it disappeared into the can. I could of left it on but I didn’t want it rolling and sticking to the inside of the can.

IMG_2045

The core needs to be centered at the end of the Can. I still have a way to go.

IMG_2047

Almost in!!

IMG_2048

I used small taps with my mallet as I aligned the core with the end of the Can. It worked out well and didn’t leave any marks.

IMG_2049

You can clearly see the core now is perfectly in place.

IMG_2056

My son enjoying the power of a pneumatic rivet gun.

IMG_2058

I used Aluminum rivets with a steel center, size 3/16” with a 1/4” grip. If I could of found a true stainless rivet that would of been my choice, but I never found any at the multiple stores I went to.

IMG_2060

The finished product and looks good.

The repack kit was bought from Newenough.com and was under thirty bucks. Fifteen rivets was two dollars. Pretty cheap if you have to tools.

The biggest difference with the sound levels now is the raspy tone is gone when cracking the throttle open. We will see how long Two Brothers packing lasts. It would be nice to get fifteen thousand out of it.

Cheers and have a good holiday!!!!

Sunday, December 6, 2009

Pictures of the past

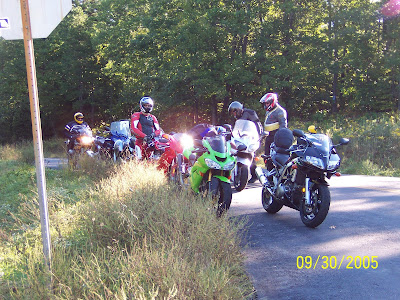
Just thought I'd post some pictures of a few years ago. It makes me sad that none of us really ride together anymore but I still have great memories from it all.
This is Somewhere in Wisconsin on a HSTA ride called Twistar.
This is another HSTA ride called Friends of Freddy. Really great sportbike roads down in Missouri. You can ride back roads for a few hours and never have a car in front of you.

Post Carpal tunnel surgery after TONS of pain pre-surgery. I had the left hand done three weeks later. Now three years later my hands never go numb no matter how long I ride. Love it!!