So after 20K miles on the KLR the chain has shown me it is done helping pull this bike along. For a stock chain it's done well with all the rain and gravel and dirt I've put it though. You can see what I call the red rust of death between the links. That color rust is when the grease that the factory made the chain with is gone and the link is failing.
If the chain also has tight spots like above even after cleaning it's also time you need a new chain. Remember if the chain snaps it will most likely bunch up at the counter shaft and destroy your engine case and ruin your day.
You always want to replace both sprockets with a new chain. The counter shaft sprocket seem to give people the most grief from what I see in the forums. Just bend the lock tab up and get a good 1/2 impact driver with a quality socket of the right size and it's better if it's a impact socket. The one THING you DON"T want to do is impact the nut with the bike in gear. The impacting can damage the transmission dog on the gears.
My trusty Dewalt impact driver it was pricy but was a must before I put a air compressor in the garage.
The right tool for the job is the motoin pro chain breaker/riveter. If your going to stick around in the bike world and do your own repairs it's worth the money.
First step is grind down the pins on one link. If you don't you will break the pusher pin on the tool. Trust me, it's left me saying a few four letter words out loud and a chain I couldn't get off for days while I had to wait for a replacement pusher to show up.
So why not just remove one pin you ask!! I could but I find it simpler to look at on the floor when cutting the new chain to length and a screw up is a $135.00 for another chain.
One more close up of the death rust. Next time your at a bike event walk around and just look for this on the other bike's. When it's really bad it will cover the sprockets.
Two links too long and I'll have to again grind just one pin this time and push it out.
Stock O-ring on the bottom and I guess you call it a X O-ring on top.
I'm not going to bother you with how to unbolt the rear sprocket but I will show you the spacer that you DON'T want to leave out.
Chain is on and sprockets are loose till the chain is riveted.
Let the sprocket do the work and hold the chain for you.
All four O-rings are on and the plate is ready to be pressed on.
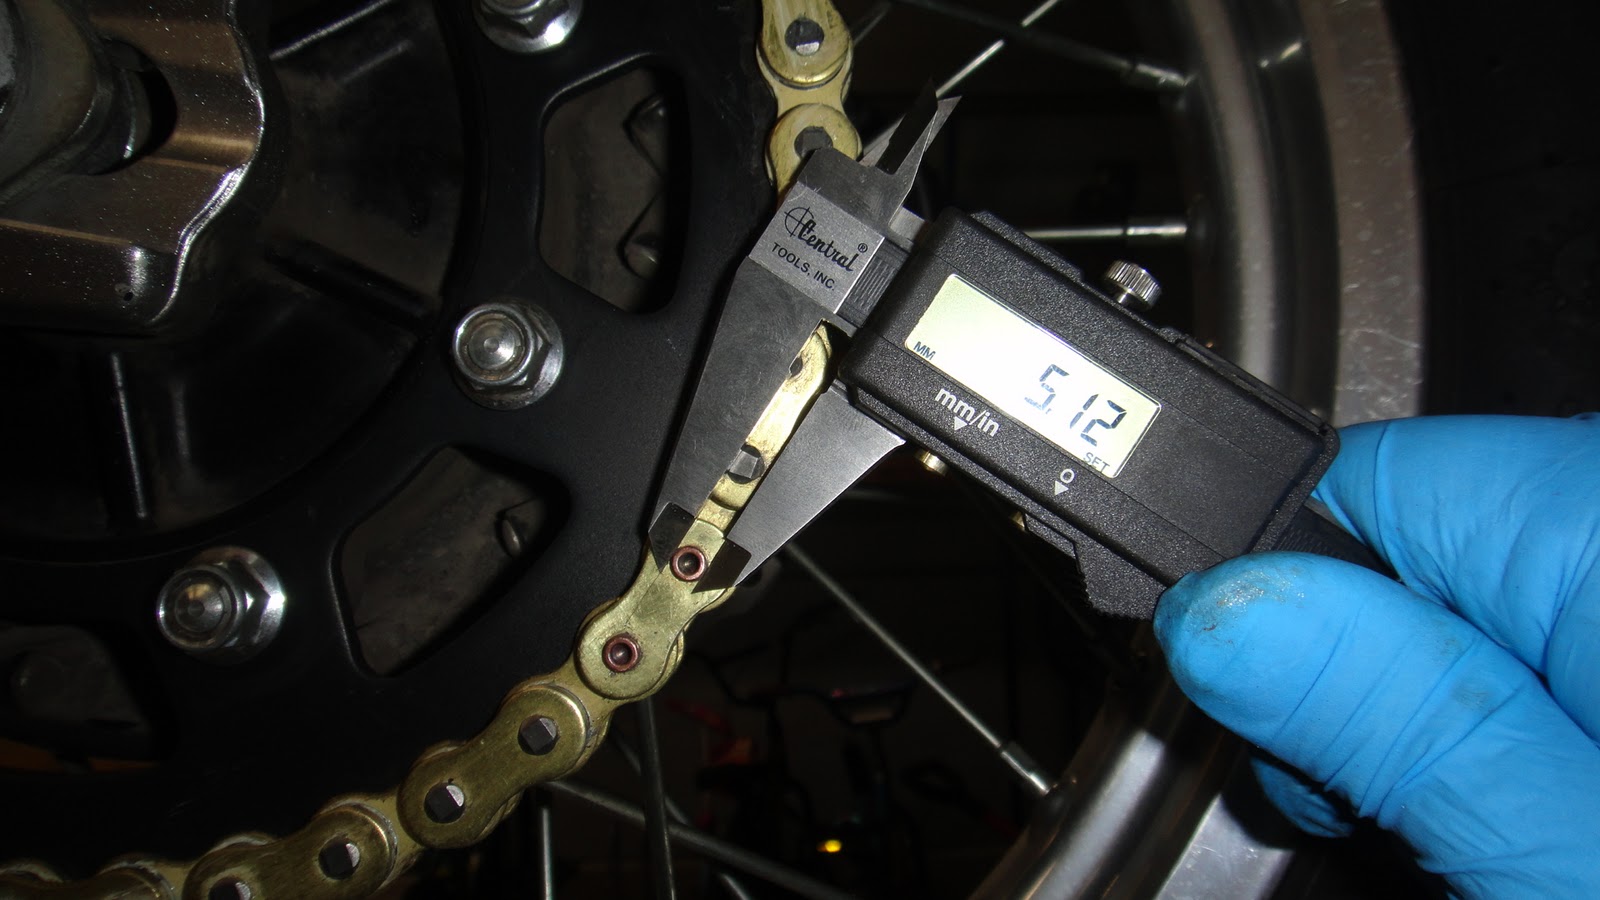
First measure another link for it's thickness to see how far to press your rivet link plate on. Remember if you press the plate too far you will damage the o-rings and too loose they won't seal out the dirt. So 18.14 is a goal number to get close to.
Go slow and keep rechecking. After a few chains you kind of get a feel for this but you should always measure.
1mm to go.
Closer.
That is very good and what 300ths away.
Now for the riveting of the link and the spec for this is .152mm to .500mm but never more than .700mm. Here's RK's link for riveting..
RK So these picks are the before measurements.

Top link riveted and flared to spec. Again take your time and take the rivet tool on and off while riveting to make sure your not over doing it!!
Bottom done.
Once the link is done it's time to torque the sprocket and set the chain slack. Make sure to properly torque the sprocket nuts and bend over the lock tab on the front sprocket. Do not use a impact gun to tighten the front nut! Put the bike in gear and have someone hold the rear brake when torquing assuming your chain won't jump teeth when loading the nut.
Chain slack is interesting per the book on the KLR. If I set it to what they call for I would damage the chain or ruin the output shaft bearing. I always set it on the loose side and then have someone sit on the bike and recheck. With a long travel suspension bike the slack will be very different loaded or unloaded.
All the chain crud has coated the neutral light switch and when I ride in the rain the light will come on at a half lit state.
It's in there all gummy and cruddy.
A little kerosine and shes looking good.
Ready to roll for another 20K maybe!!


 Top link riveted and flared to spec. Again take your time and take the rivet tool on and off while riveting to make sure your not over doing it!!


No comments:
Post a Comment