
After coming out of my bike is fracked up shock I went and grabbed my son and shot over to the auto parts store to buy a test light since my was at work. When I got home I had to wait to start testing because we were throwing my four year old a birthday party. Crap, right!!
 New test light and testing of the test light. This is the NO.1 step always test your light new or old. Here I'm just using my battery tender plug the test and my ground to test the kill switch and crank button.
 First step was check power to the crank button. I had a good light to the yellow/red wire and with the button pushed I had nothing on the black wire. NOTE: the engine kill switch must be on for voltage be supplied to the yellow/red wire.
 After a close look the area that the spring sits on was slightly green and needed to be cleaned up. A dremel with a nylon brush is perfect as it won't melt the plastic or remove metal around the contacts.
 Remove the spring and DON'T let it go flying away because you can't just buy the spring. The spring real gives poor contact surface area to be part of a switch but this is the way it is.
 Just clean with light pressure and don't melt the plastic. The only spots that need cleaning are where the spring sits in the button.
 The other side of the spring contact.
 Buff out both ends of the spring and DON'T let the spring got. Trust me bad words will follow!
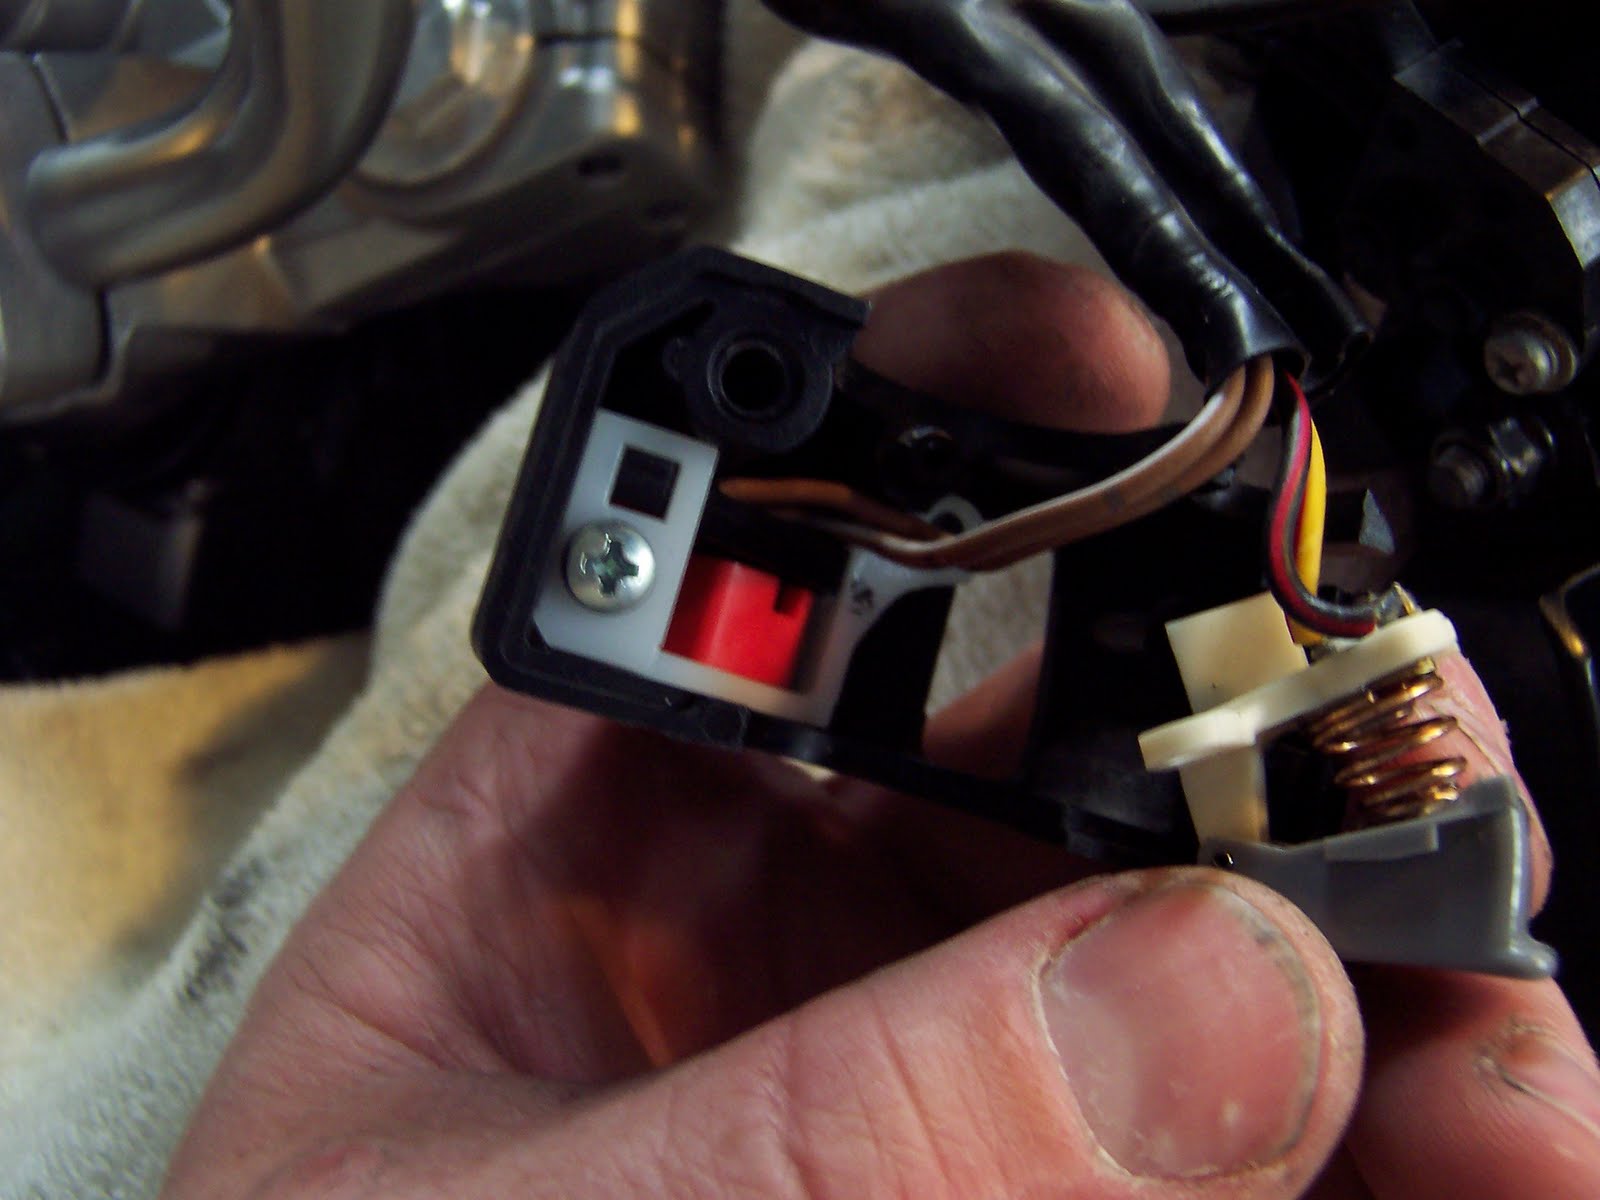 The spring is back in place but before you do, add some dielectic grease to the surfaces the spring sits in, not a lot is needed. Also getting the switches back into the housing is a little tricky with big hands. Kill switch goes first with just the screw you see here and then the two for the crank button. Don't forget to replace the tiny zip-tie that held the wiring to the housing.
After all this she has been starting perfectly for a week. I have been through a lot of rain with this bike compared to the ZX-10R and my old ZX-9R on all these road trips. One dark winter I'll have open up the switch on the ZX-10R and see how it fairs.
5 comments:
Nice "how-to". Good photos.
I suppose my Ninja has one of these spring thingys. I'm sure if we ever have to open this up it will immediately shoot across the garage, bounce off several somethings and disappear forever. It will happen on a Saturday evening after the shop has closed.
Sorry you had motorcycle troubles, that's never fun, but on the plus side, we get a nice write up of the fix. Good job!
bluekat I'm sure your right with the switch being very similar but my ninjas never had a issue yet.
Hiya Jon,
Seems like you have been a wee bit busy looking at the blog 2night. LOL..
TT
Man, I usually use the side of a socket wrench for these problems. This whole test light thing seems quite sophisticated. Maybe like a step in the right direction though...
Post a Comment